Have you always wanted to grow your own corn but didn’t know where to start? Well you’ve come to the right place.
In this four part series, we will be sharing with you all our secrets on how to grow epic corn. In part one of this series, we will show you the best way to sow corn seeds to get a head start on the season, using all recycled materials that don’t cost you a cent.
Video tutorial
Heirloom Corn
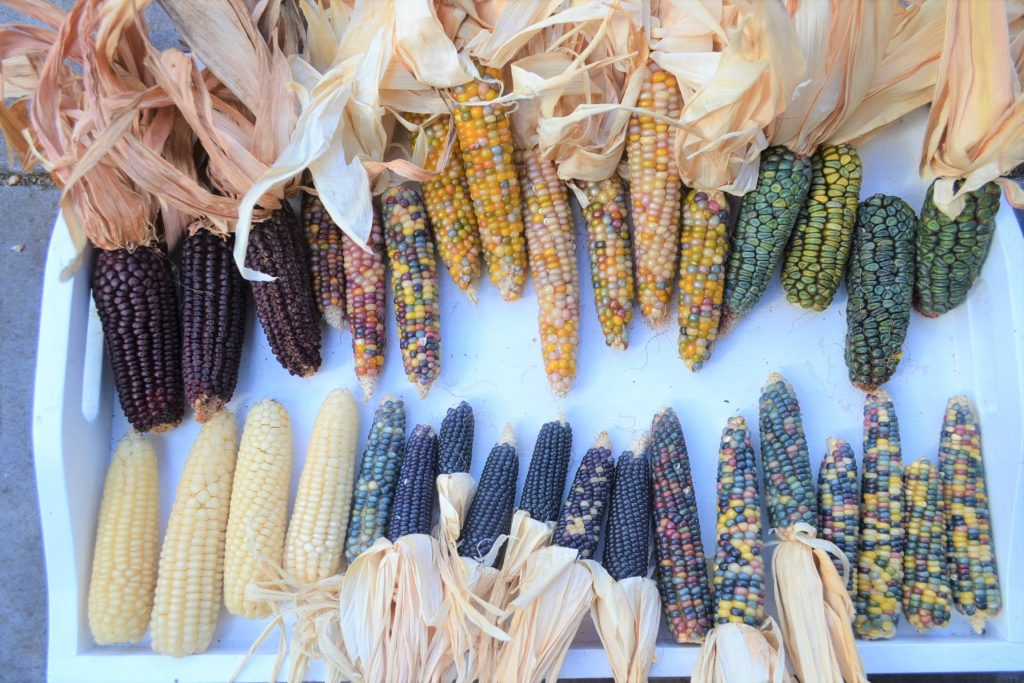
If you’ve only ever bought corn at the supermarkets before, then chances are you probably have only ever seen yellow sweet corn. You’ve been missing out on all the rainbow goodness of heirloom corn! Given heirloom corn is the original corn, I find it a little amusing when people ask me: “Is this corn edible?!” or “Is it genetically modified?” YES this corn is edible, but no it doesn’t taste like sweet corn. And it is absolutely NOT genetically modified, this was the original corn before corn was selectively bred and commercialised as yellow sweet corn.
Today, we will be sowing this glorious Oaxacan green corn. It’s so iridescent it almost looks metallic! It’s an heirloom corn variety, grown for centuries in Mexico and one of our absolute must-grows each year. Not only is it a stunning centerpiece, but it can also be ground down to corn flour, and it makes the softest and most delicious tortillas.
For more information on the different varieties and uses of heirloom corn, their uses and for seeds, check out our Shop.
Now let’s get started.

When do you sow corn?
Corn is one of the easiest veggies to grow from seed, and we would definitely recommend you grow from seed. The technique we will teach you today works for all varieties of corn. We will show you how to raise your own corn seedlings, that will be bigger and healthier than their nursery counterparts and for a fraction of the price of seedlings you can buy.
There’s no question that corn loves it hot; it is a warm temperature plant and is grown over summer. Corn requires 60-100 days to mature from seed sowing. Depending on your climate, this often means you will want to sow your corn seeds indoors from around late winter to early spring, to get a head start. If you start too late, you can also sow in summer but choose your sunniest spot and get them in as early as possible.
Sowing in punnets vs sowing directly in soil
There are so many benefits of sowing your seed in punnets rather than planting directly in the soil:
- Have you ever planted seed straight into your garden beds and find that they disappear? They could have been eaten by birds, dried out or even rotted in the elements depending on whether it was too dry or too wet. Sowing in punnets allows you to control the exact growing environment for your seeds, maximising their chances of germination.
- You can also get a head start on your season – often the soil outside is still too cold, but by sowing indoors you can raise big healthy seedlings that are ready for planting out once the weather is warm enough. Corn needs a long hot growing season and you want to be ready to make the most of this.
- If you’re anything like me, even by spring, your beds are still packed with winter veggies (particularly if you have a shady yard like ours!). You don’t need to wait until you have vacant bed real estate before planting seed. Planting in punnets means you can start your seed growing into big healthy seedlings while you’re still harvesting and enjoying your winter veg outside.
- Do you have snails, slugs, earwigs or slaters? They can decimate small corn seedlings overnight. By sowing indoors in punnets you can protect your defenceless corn seedlings when they are babies, and only plant out when they are big enough to fend for themselves.
- Planting in individual punnets is so convenient, it will allow you to plant straight into the soil and minimise transplantation shock.
Our favourite sowing method
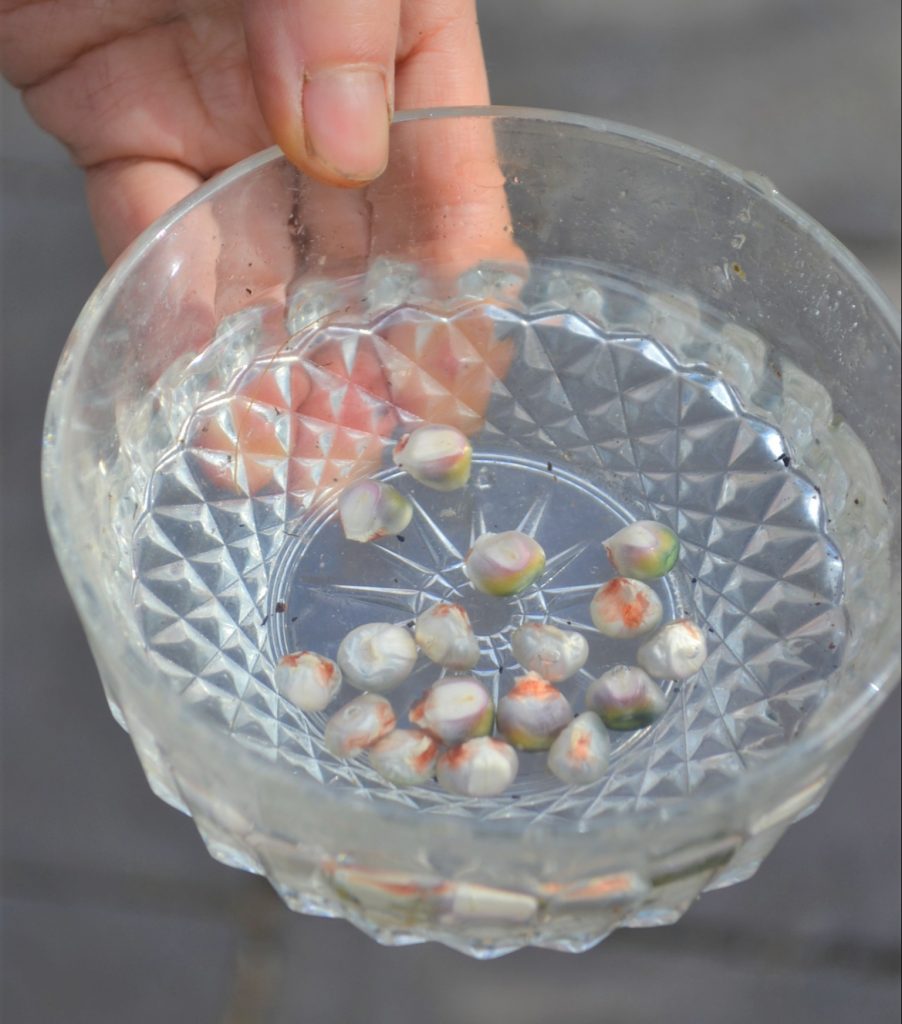
Step 1: Soak your corn seeds. Corn has a tough outer skin and soaking will help them germinate quickly and give you higher germination rates.
As corn is wind pollinated (we will come back to this later in the series when we discuss pollination), we recommend planting a minimum of 9 seeds/plants so you can achieve a 3 by 3 block.
Here we are soaking a few extra as back up, because things don’t always go to plan so you want to have a few on stand-by. Let it soak until the seeds plump up, usually for around 12-24 hours.
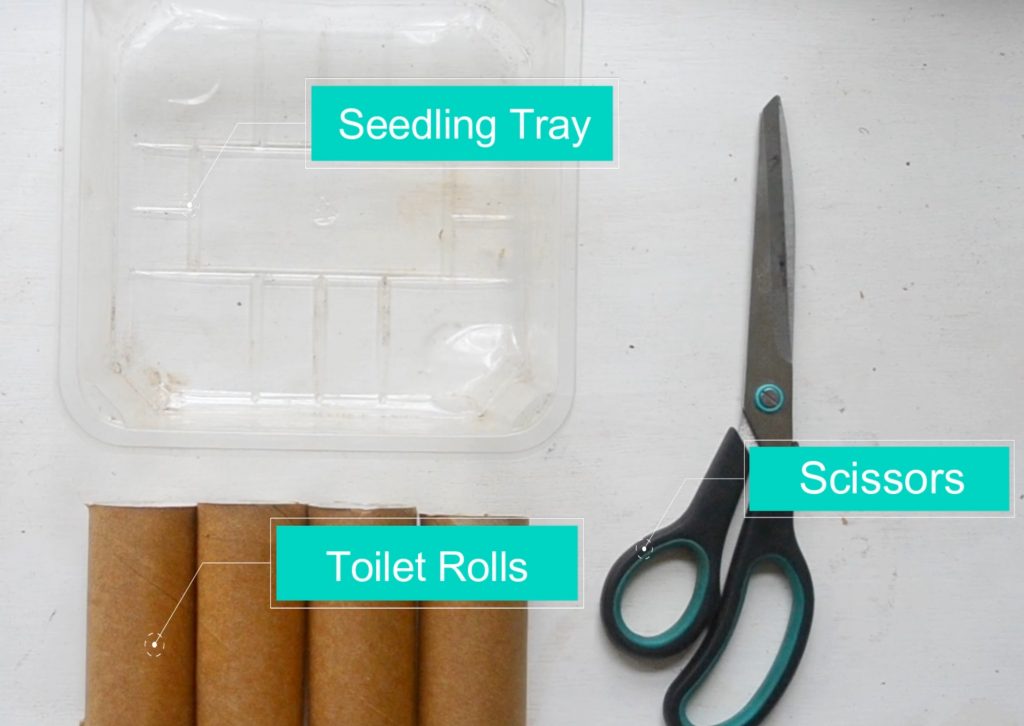
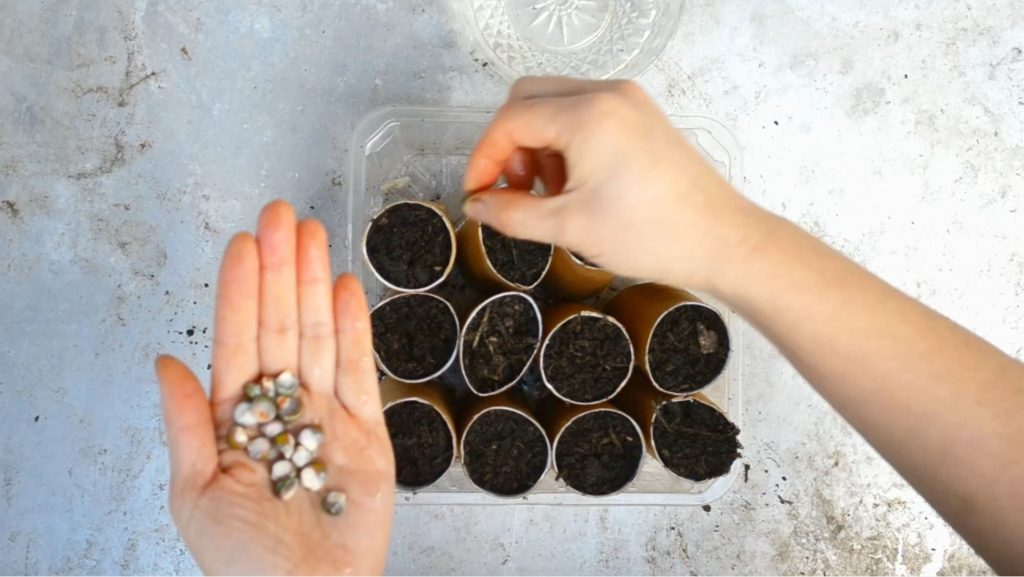
Step 2: Gather your materials, we are using entirely recycled materials from what we have around the house. So here we have:
- toilet rolls which will become a biodegradable seed pot (they are so handy, so save up your toilet rolls!)
- a plastic container that used to house mushrooms but which is the perfect no-leak tray for our corn seedlings
- a pair of scissors.
Step 3: Using your scissors, make a few cuts on the bottom side of one of your toilet rolls, and then fold up each of these sections which creates an enclosed seed sowing pot. It’s so easy. Sowing in individual pots will give your corn the best chance of success as it minimises transplantation shock – you can plant each pocket directly into the soil, without damaging their roots. Don’t worry, the cardboard will quickly break down and allow your corn to spread its roots into the soil.
Step 4: Now we’re ready to fill our pockets with seed raising mix or good quality potting mix. This is very important. Don’t skimp on this, after all this is the first food for your baby seedlings – trust me I’ve been there done that with the cheap bag of potting mix. While you saved a few dollars at the checkout, the cheap mix will produce yellow and stunted seedlings, and you’ll have wasted your time. The old adage ‘you get what you pay for’ very much applies to potting mix.

Step 5: Pop your soaked corn seeds into each pod. One seed per pod. Then cover with more potting mix, ensuring the seed is fully covered. Use your fingers to press down and firm the top of soil. You want the seed to make full contact with the soil so that it is enclosed in damp soil to help it germinate quickly.
Step 6: Put your tray somewhere warm – we are putting ours in our greenhouse but this could be indoors near a heater or under a north facing window.
Step 7: Don’t forget to label and water in a little, you may need to top up with soil if the seed is exposed. Don’t water again until the soil is looking and feeling dry – cold and soggy soil can result in the seed rotting before it germinates.
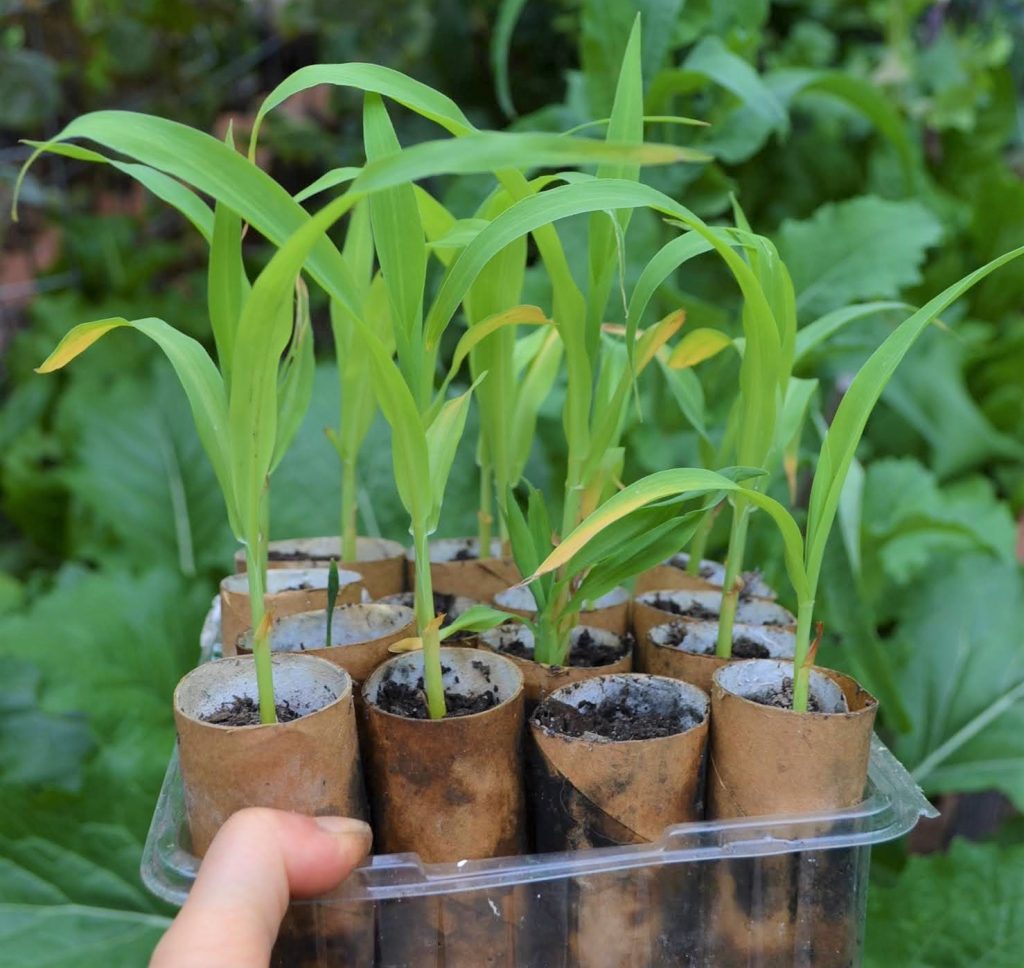
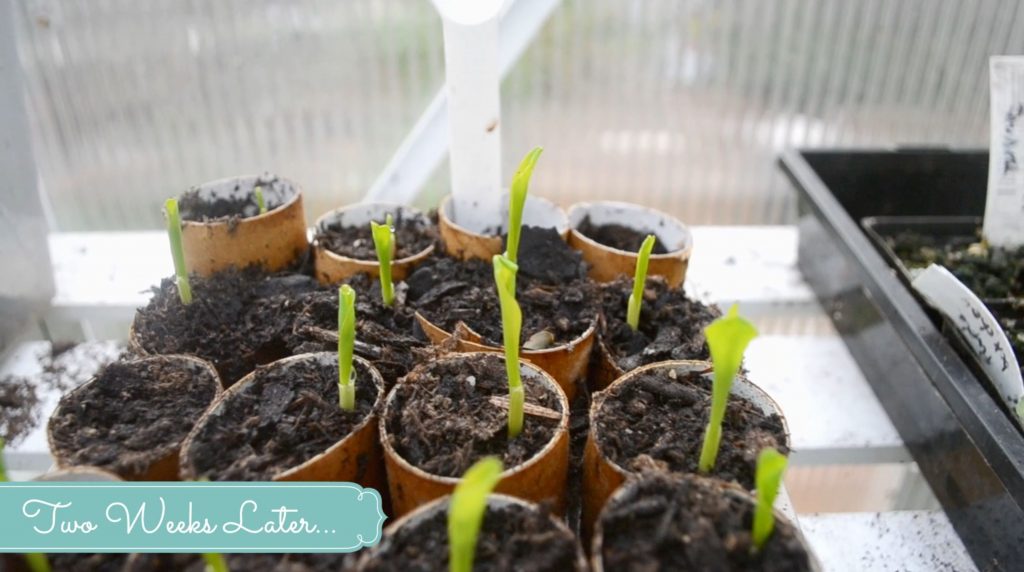
Depending on your temperature, you should start to see lots of lovely little green shoots emerging from the soil from between one to even up to four weeks. In our greenhouse which averages around 19 degrees celsius during the day and 10 degrees at night, our corn usually germinates in two weeks.
So what next?
Subscribe to our Newsletter and Youtube channel and you’ll be the first to hear when Part 2 is released. We will show you how to plant out your corn seedlings, including how to size up your seedlings if you don’t yet have the bed space to plant into, and how to properly prepare your soil to feed your hungry corn plants, for an epic corn harvest.
When will the next part be posted?