Great mayo is harmony, versatility, and ease. It gives boiled potatoes life, it moistens stale bread, and it adds zing to carrot sticks. And let’s not forget how great the classic dressing is when paired with other flavours. Think Perinnaise. Aioli. Miso. How many other ingredients are that friendly?
Over the years I’ve perfected our mayo recipe to an art – and the best bit about this recipe? It uses a simple pantry ingredient that will impress your vegan friends, without compromising on taste – it is super creamy and delicious and dare-I-say tastier than egg-mayonnaise.
Why make your own mayo?
You might think that grabbing a jar of mayo off a supermarket shelf is easy, but read on and you’ll see that making your own can be just as simple. We make a batch once a fortnight, sometimes more often. Whenever I need a dressing to bring a salad together, or a sauce to bring together a sandwich, it’s only a blitz away.
The great thing about making your own mayonnaise is that you can make smaller batches, so you don’t need to stress over having a whole opened jar in the fridge. But when this delicious, it doesn’t last very long! It’s also nice to be able to know and decide what goes into your food. That means: no added nasties like colours, flavours or preservatives which are often in commercial mayo, and only as much sugar as you need. Making your own mayo also makes you look like a pro in the kitchen, even though it’s super easy.
Not to mention lower food miles – when you need mayo, pull out an ingredient from your pantry and voila you have mayo!
But wait… mayo can be made without eggs?
I discovered this mayo when we had run out of eggs, yes you can make an eggless mayo that tastes just as good or dare I say better than standard egg mayo! My mind was blown too when I first found out. These days, we try to cook meals that are powered with plants, and this has become a staple recipe in our kitchen.
While there are many dishes that claim eggs as their hero; mayo is not one of them. Actually, this egg-less version tastes better than the original.
So how do you make mayo without eggs? You use aquafaba. Despite the fancy name, it’s something you’ve probably made and thrown away in the past. It’s the water left over when you cook beans, with the richest source of it being chickpeas.
Chickpeas? The ones that go into hummus and falafel? Yep — those. It’s fun to think that such an unassuming ingredient — the by-product from cooking beans — can be transformed, via some simple kitchen-science, from dishwater into a glossy, white sauce, worthy of a Parisian restaurant.
Using aquafaba instead of eggs also means we’re reducing our intake of an animal product that has dubious credentials. Given that commercial eggs have potential ethical concerns and can be a breeding ground for salmonella, many restaurants are now using aquafaba as a lower risk alternative. So, dropping the eggs and embracing aquafaba is not only better for our health, but also the chickens who work hard to bring us our eggs and the environment. Not to mention it’s better for your wallet.
A step-by-step video instruction is here, and written instructions below.
Making Aquafaba
Make your own aquafaba is so simple. It also saves a heap of money, and avoids all of the packaging and food miles associated with shipping liquid around (yes you can buy aquafaba).
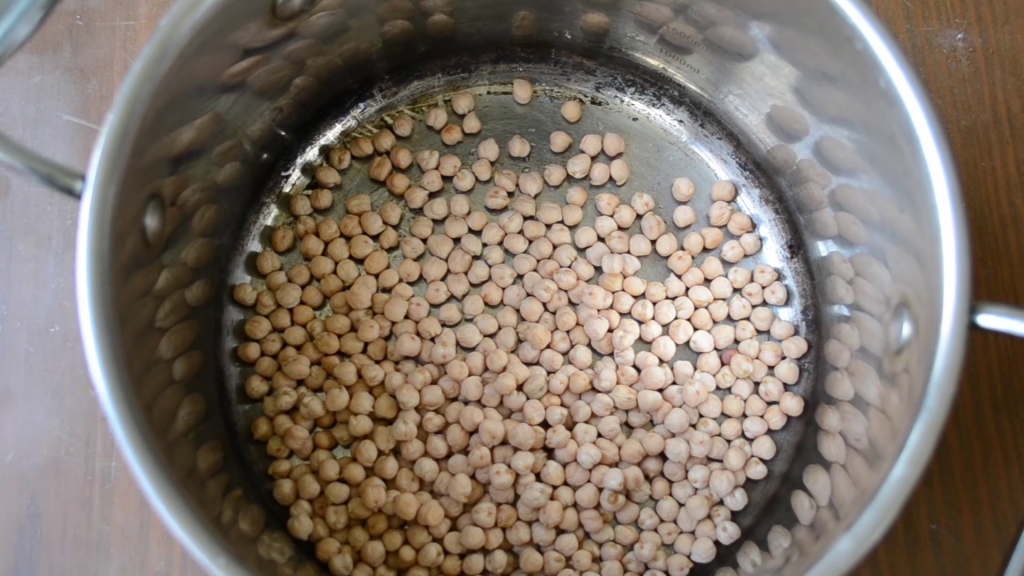
Soak chickpeas in enough water to allow for their expansion — two parts water to one part chickpeas is a safe ratio. I usually like to work with a cup of chickpeas at a time, so 2 cups of water is enough.
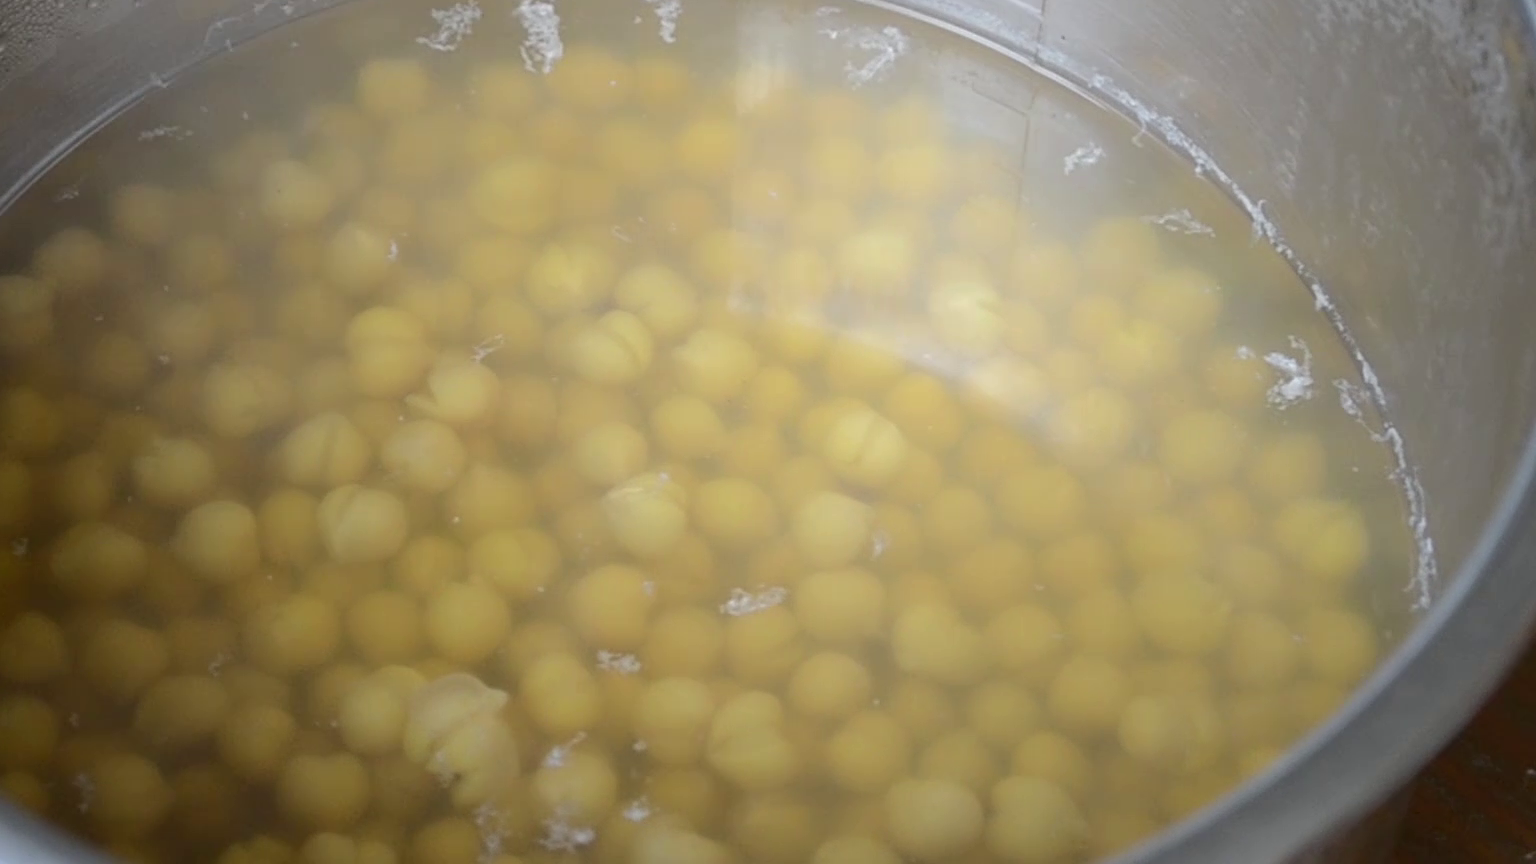
The next day, you’ll notice the chickpeas have expanded. Drain them, discard the soaking water and add 3 parts fresh water. Cook for an hour on the stove, or half an hour in a pressure cooker.
Once they’ve finished cooking, remove the cooked chickpeas with a slotted spoon, leaving the cooking liquid in your pot. There are of course endless recipes you can use cooked chickpeas in, and I will be sharing our favourites soon.
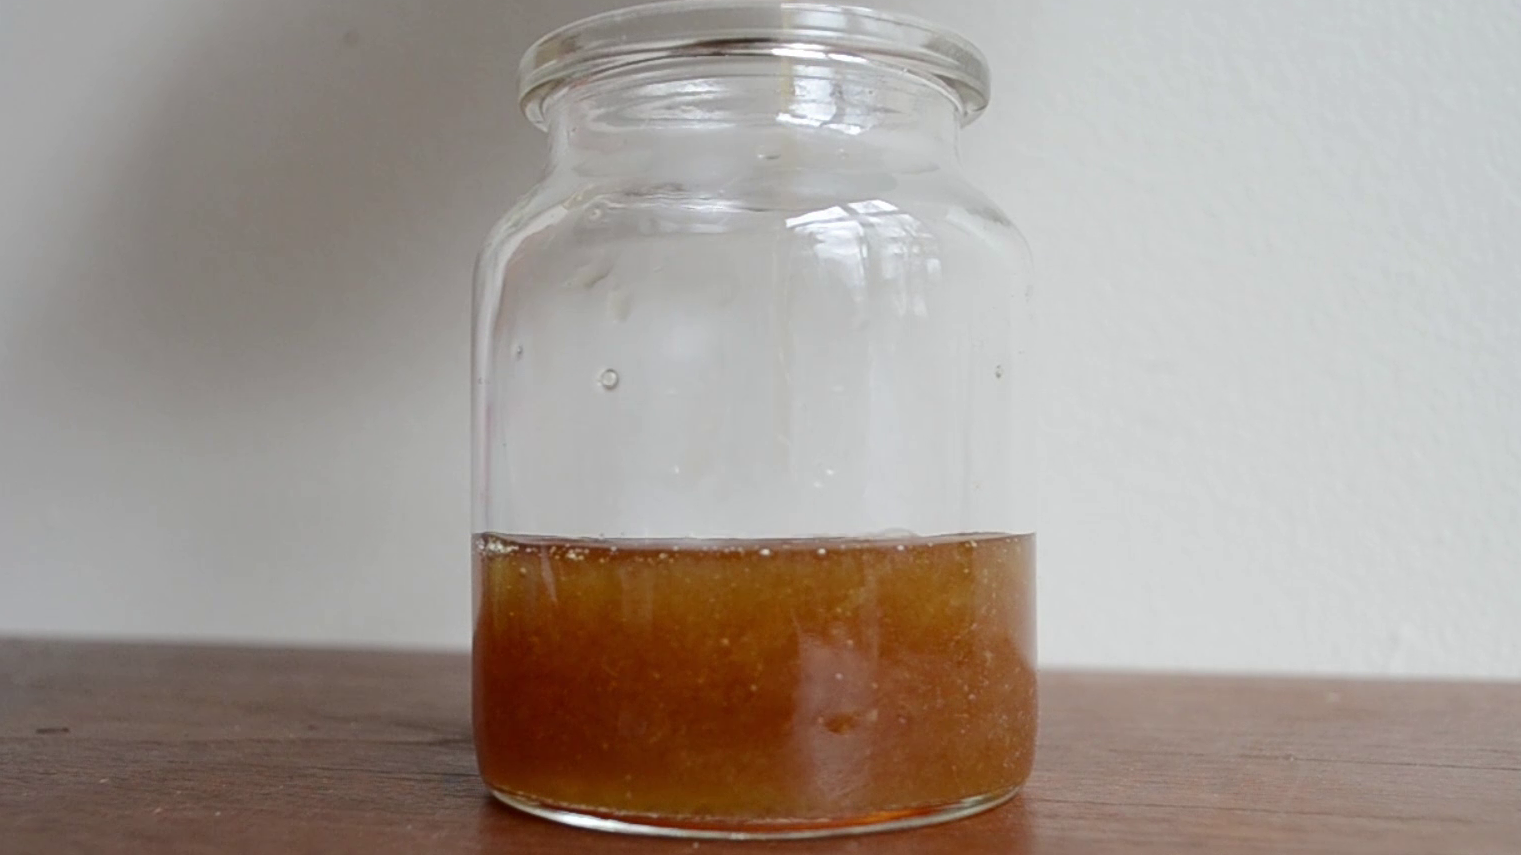
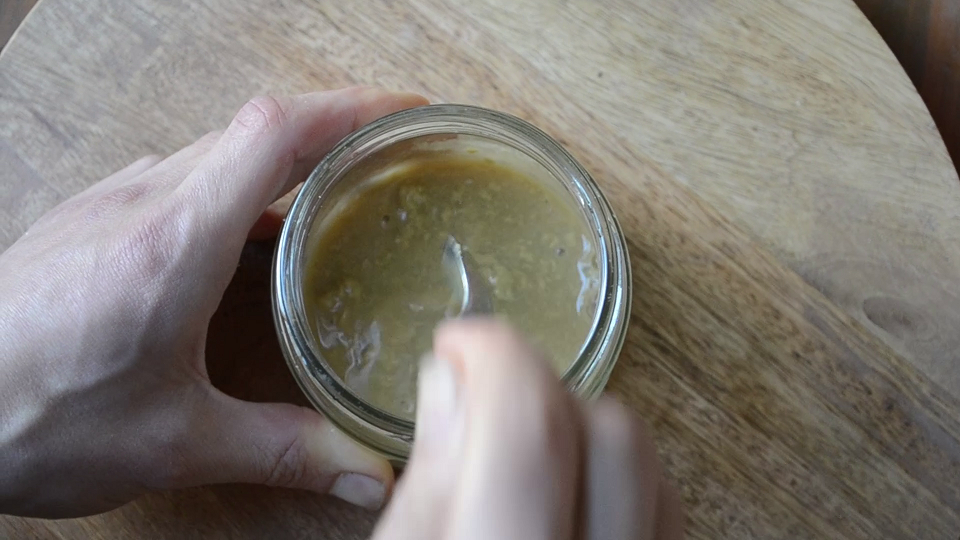
Simmer the liquid on low and without a lid until it’s reduced to around a third of its original volume. This step should take about 20 minutes, and once the liquid has cooled, you can store it in a jar. We store any excess in the freezer for a ready supply. Oh, and we can probably start referring to it by its more catchy name — aquafaba.
Making Faba-ulous Mayo
If you’ve followed our first part, you will have your own aquafaba. If using from frozen, defrost first. You’re now ready to make egg-free mayonnaise.
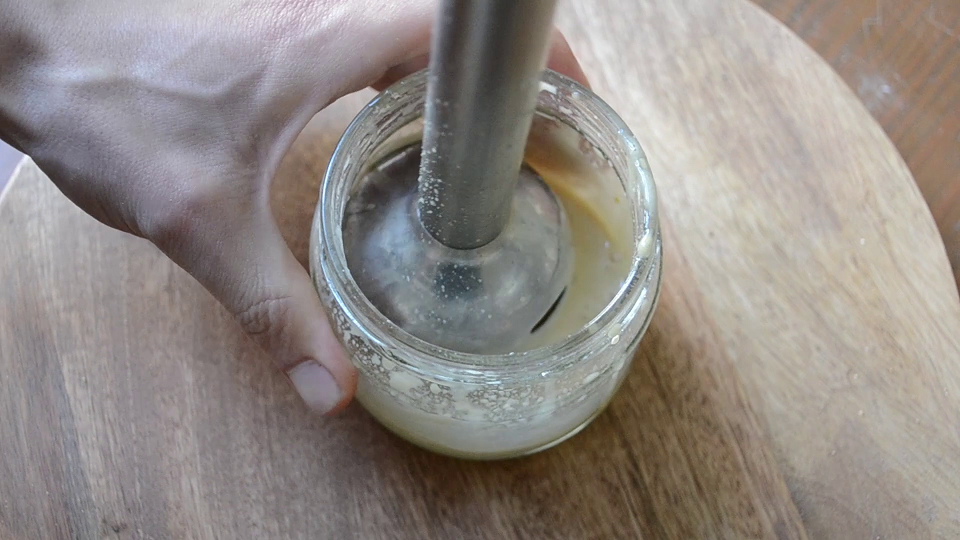
Start by adding aquafaba, mustard, vinegar, salt and sugar to a small food processor. If you’re using an immersion blender, you can find a wide-mouthed jar with a capacity of 200ml, something like a wide, squat jam jar.
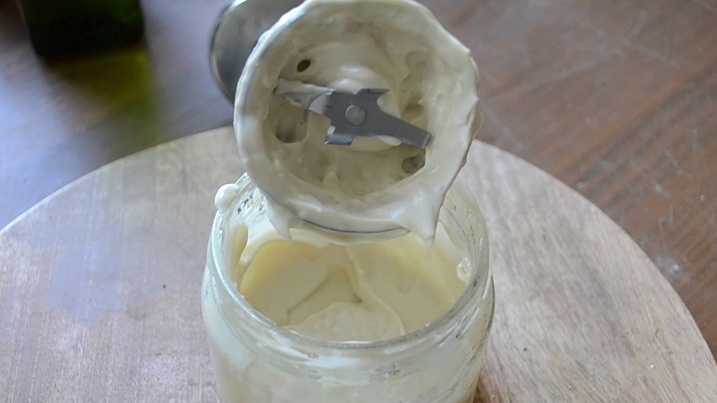
Give the ingredients a quick mix with a few pulses. Once they’re mostly combined, start by adding a teaspoon of oil to the mix, and then pulsing to thoroughly combine it. Continue to add oil 1 teaspoon at a time; or, if you’re able to, slowly stream the oil in while the mixer continues to run. Keep adding oil this way until the mixture begins to thicken and take on a paler colour. You can stop when the mayo reaches your desired consistency. Oddly enough, the more oil you add, the thicker the mayo becomes. I generally like to stop when I can turn the mayo upside down and it stays in place in the jar.
Transfer the mayo to a jar if you’re not already using one, then screw on the lid and store it in the fridge until you need it. It should keep for up to a week in the fridge.
Levelling Up
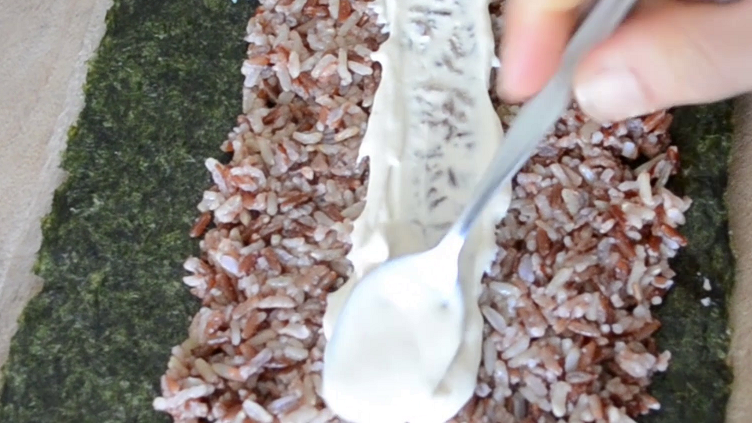
Isn’t this a great recipe? Here’s how we can make it even better. Add in a teaspoon of fresh or dried garlic to turn this — in the best sort of kitchen magic — into aioli; mix in some peri peri sauce to make a perfect dipping sauce for fries; add a tablespoon of miso for a fun nod to kewpie — perfect for Japanese dishes like okonomiyaki and sushi.

BEST mayo: Creamy & super easy / You’ll never guess that it’s egg-free mayonnaise! / Vegan / Recipe
Ingredients
- 3 Tbs Aquafaba*
- 1 Tsp Dijon Mustard**
- 1 Tsp Garlic powder (optional)**
- 1 Tbs Apple Cider Vinegar
- 1/4 Tsp Salt
- 1/2 Tsp Sugar
- 2/3 to 1 cup Neutral flavoured oil (e.g. rice bran, sunflower, canola) Avoid strongly-flavoured oils like olive oil***
Instructions
- Combine all ingredients except the oil in your mixer.
- Add a teaspoon of oil and pulse your mixer to thoroughly distribute the oil. You don’t want to add the oil too quickly, or else the emulsion will fail. Repeat this a few times until there are signs that the mixture is starting to thicken.#
- Slowly stream the oil into the mixture, and keep the mixer running, looking for signs that the desired consistency is reached–it should thicken up substantially, and become paler as you add more oil.
- Stop when you're satisfied with the end result. Be aware that the mayonnaise will thicken somewhat when you store it in the fridge.
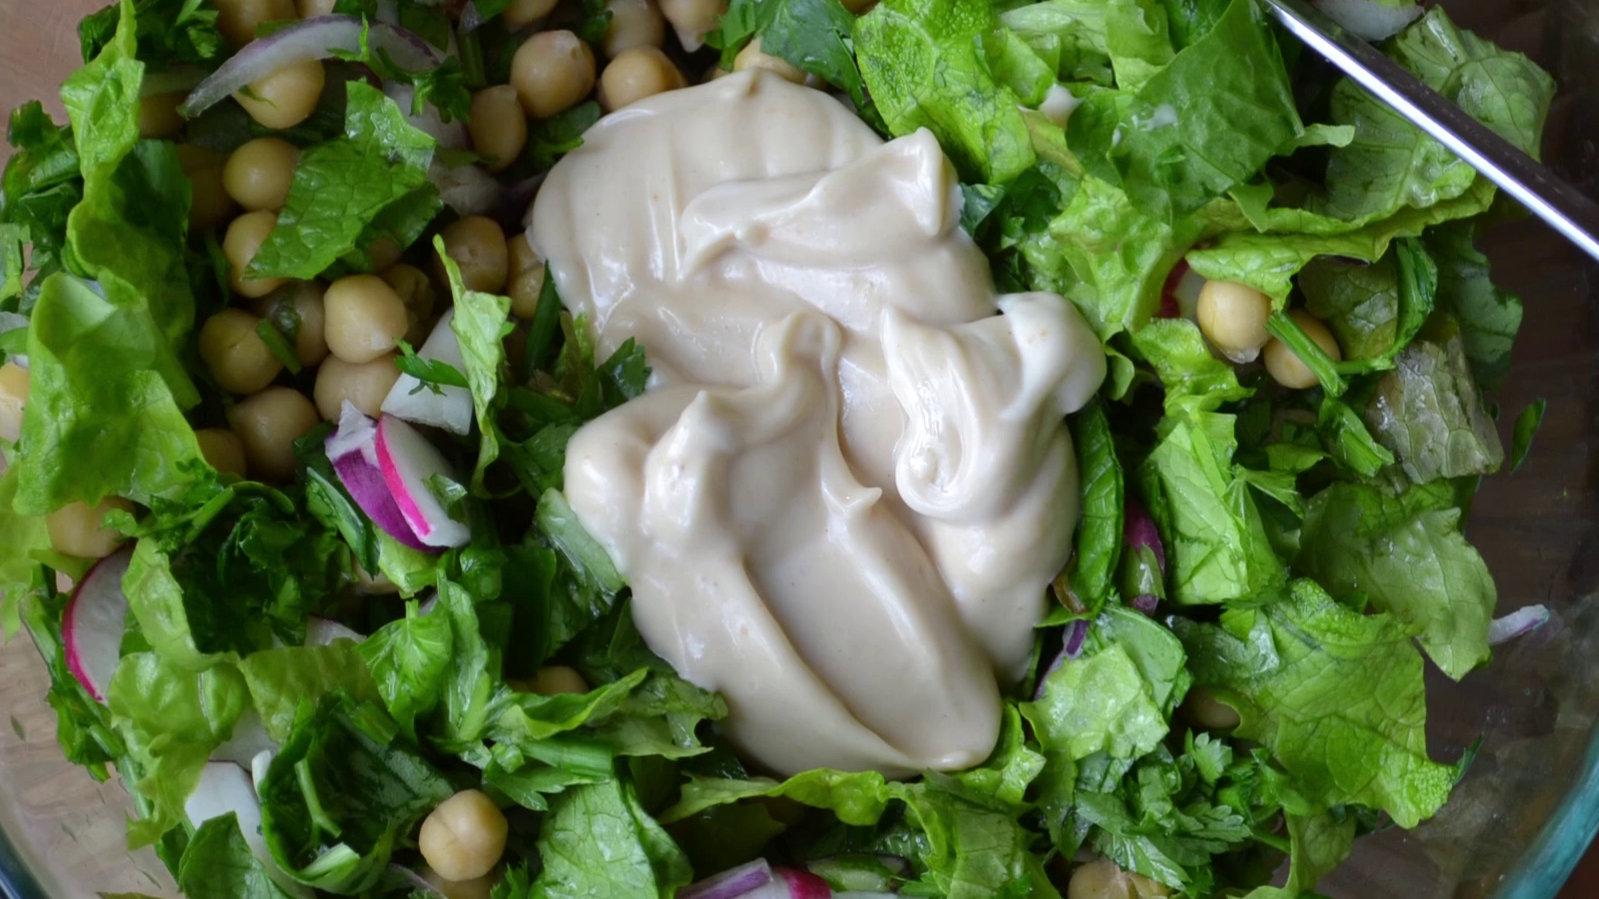
- Enjoy your mayo in salads, on sandwiches and as a delicious dip.